
|
|

|
|
* Render Setup - Single - Files " Jpeg " - RENDER

|
Shortcuts |
ALT + W = Zoom Out of a Viewport
T = Top
F = Front, etc
MM = Pan (MM = Middle of the Mouse)
AlT + MM = Pan Orbit
Control = Multple Selections
Shift = Copy
Z = Zoom to any selected object
ALT + W = Zoom Out of a Viewport
T = Top
F = Front, etc
MM = Pan (MM = Middle of the Mouse)
AlT + MM = Pan Orbit
Control = Multple Selections
Shift = Copy
Z = Zoom to any selected object

|
Enhanced Menus |
Enhanced Menus - In the Work spaces drop down, this will switch to a work space that has other menus and layouts
X = General Search
Right Click on object = Quad Menu (convert to Editable Poly - vertex, edge, polygon, etc.)
Bottom Left side you can change the way the 4 viewports look and are displayed
Autokey & The Timeline 0-100 Frames
(this creates animations, changes, etc.)

|
Materials |
M = Material Editor
Choose 'Standard' on left side (to add a picture)
Choose 'Diffuse Color' and then drag it out of the box
Right Click 'Bitmap' (find your picture text)
Click the small green cube to apply it (top left)
Right Click on Bitmap in editor and choose 'Show Shaded Material in Viewport'

|
Top 10 Why You Can't Select an Object... |
1. Unlock It (Space bar or Turn off lock toggle)
2. Click the Wireframe, not the volume
3. Unfreeze the object (Right click quad menu / Unfreeze All)
4. Turn off the Creation Tool, the thing you are using or click Select Object
5. Get out of Sub-object mode
6. Make sure Window / Crossing is set to the mode you want
7. One-sided object? Click the other side
8. Turn off the tool that's expecting a selection, or click Select Object
9. Reset the Selection Filter to All or Geometry
10. Use CTRL to add the selection not SHIFT

|
A Selection of Selectons |
Just about every operation you preform will start with the selection of one or more objects or sub-objects... Every type of selection can be one with the tools at hand. It's just a matter of knowing them so you can mix and match when needed.
Tip - Pressing the Spacebar locks or unlocks the current item.
Select Multiple Objects hold down CTRL while clicking
Shift and click = Copy an object (or Instance)
H = (shortcut key) Opens up List Mode
Sub-object level = You can only select sub-objects that go with that level (vertex, line, polygon, etc.)
Selection Filter = Limit selections to such as ( lights, cameras, etc.)

|
How to Add Multiple Materials on One Shape/Project |
M = Material Editor
Choose 'Multi/Sub-Object' on left side (to add a picture)
Double Click it after it's in your Editor
On the right side there will be a menu, you can choose how much materials you will add
On the editor on the first material choose whatever, but Standard will be just fine.
Choose the pictures you want to add to the shape/project
When you have added all of the materials you want, go to your viewport.
Right click you project and convert it into 'Editable Poly'
On the right side choose Polygon in 'Selection'
Scroll all the way down to 'Polygon: Material IDs'
Then choose a side of your project and make the number on the side match the material you made in the Material Editor.
When your finish matching all of your IDs with the Materials you wanted
Go back to your Material Editor
Right Click on Bitmap in editor and choose 'Show Shaded Material in Viewport' to all of the materials.
Click the small green cube to apply it (top left)

|
Modeling Tools |
Primitive objects are the starting point for most of your objects (standard & extended)
The box is the most common base object to use for models
A primitive can be turned into an "Editable Mesh or Poly" - (vertices, polygons, etc.)
Sub-object level - click the black icon or the red icons
Splines are used to make models also - (Sweep or Lathe modifiers to turn into 3D)
* Clone an object = SHIFT + Click
* Copy = independent of the original
* Instance = maintains a connection between the two so changes affect all
* Reference = are a combination of the two, which can be useful sometimes
|
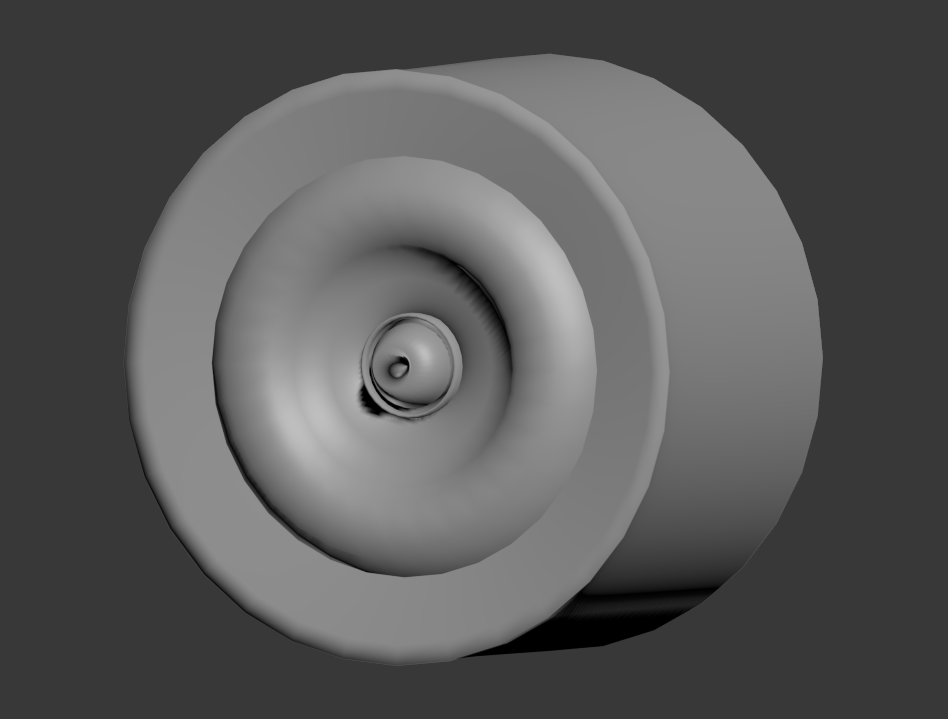
Spline to Low Poly (Wheel/Tire) |
Create a line/spline use Vertices curved and straight lines
Add Lathe Modifier - choose X axis direction
(Double check the Flip Normals - Shift Q Render)
Then you can convert to Ed Poly - bevel, extrude, model, etc.
Add at least 3 multi-materials
Make 3 copies and model your car with planes (ed poly) & boxes
|
Render Setup/Rendering Basics |
Open Render Setup or F10 - Choose either 'single' or 'frames' for animation
"Files" - Choose either JPEG/PNG (Picture) or AVI/MP4 (Animation)
Choose the quality you want / Mental Ray or Default Scanline
Save As - Set your final location and name it...
Click "Render" - Go find your rendered file.
Basics
1. Always go to Render Setup )Choose Single or your Range of Frames)
2. Choose from Resolution Presets
3. "Files" Save to a location so you know where to find your render!
------------------------------------------------------------------------------------------------------------------------------------------------------------" Time Output " in Setup Dialog choose " Active Time Segment or Range" of frame
" Output Size " group choose from the presets (don't make any custom)

|
Render Setup (iMovie)
|
Save your rendered movie to a flash drive
Find a music track to play in the background
Find a sound effects to help make the animation more realistic
Put the clips together and make them in order

|
Making a Scene |
There is a myth that you should spend most of your time modeling, and then cram all the lighting, texturing, and animation into whatever time remains on the schedule. This so-called wisdom stems from the 1990s when CG was new, modeling was a rare skill, and any rendering at all was impressive, Now clients expect decent materials, lighting, and animation if not outright realism. To achieve this goal, the best approach is to take time at the front end to gather ref materials such as pics, drawings, videos, textures, etc.
You should always plan your scene around your camera shots, models, textures and lighting setups. Having a proper storyboard before you start is important to this process.
1. Before getting on Max - gather up a few pictures, you will use them for references.
2. Sketch out the scene with major elements, cameras, etc.
3. In Man block out the scene with primitives as placeholders for the final objects and test out lights.
4. Gather up or create your textures
5. Make your models - use Editable Poly
6. Materials and Maps are next.
7. If the animation is part of your scene, get a rough one in place before you start on lights and rendering . Test renderings and previews will give you a quick final result.
8. Place lights in the scene to simulate "real" lighting, such as near an indoor lamp or in the sky to sim the sun. Shadows are a key element in adding dimension.
9. Test render shows you how your scene is going... compare it to sample photos and pick out details that will improve realism... we can improve reflections and other things...

|
Making A Scene with Buildings |
When you need to populate a scene with building, you can do it with a long arduous process or if you like quick and easy... The Preserve UVs feature of the ED Poly object makes it possible to visually shape the building right to the map without leaving the Front Viewport.
1. Get photos of building, make sure at least one is almost straight on view - you can correct perspective in photoshop and grab parts to use as textures.
2. In 3DSMax create a box and map the building image onto it Assign a UVW Map modifier and use Align to View, Fit and Bitmap Fit to mp the image correctly.
3. To force vertices to move along existing edges, turn on the Edge option in Constraints section of the Edit Geometry roll-out
Good textures maps are the key to believably in your renderings. Realistic textures can bring a crude model to life but it doesn't work the other way around. If your textures aren't up to par your rendering will suffer accordingly rather than paint your own textures. Start with photographs as a base and do a bit of cleanup in Photoshop
1. A straight on photo of an object makes an excellent basis for a texture map.
2. If the map doesn't match the object exactly the background color will 'bleed' on the object.

|
Biped Body Parts |
Biped Body Parts work a little differently from regular 3DS Max objects. While you can animat as usual with Auto Key, a few other tools are available ton the Motion panel that are specific to Biped tools.
To create a Biped click 'Create' panel > Systems > Biped and drag anywhere in the scene.
One of the easiest ways to get an animation is going with the Biped to create footsteps for it.
To create a Biped click 'Create' panel > Systems > Biped and drag anywhere in the scene.
One of the easiest ways to get an animation is going with the Biped to create footsteps for it.

|
Making a Character |
Not all character models are created equal. A model that looks great that is still rendering is not necessarily going to animate well. This is why when you're modeling a character you need to pay attention to how you construct it in addition to how it looks when rendered. Character that animate well have these attributes in common.
The model consists of 3 and 4 sided polygons only. These make a smooth edge flow, but that's not all Many game engines work only with 3 to 4 sided polys, and Turbo Smooth modifier itself behaves correctly only with these types of polygons.
In the beginning 3DS Man had no built in character animation systems. From 1990 to 1995 animators had to fend themselves with Bones, morphing and primitive IK systems. Then in 1996 3DS Max signature Biped Skeleton was created. There is a long legacy of Biped sooner or later.
The Skin modifier continues to be the tool of choice for skinning, but the original mod was called Physique. 3DS Max newer toolkit is called CAT = Character Animation Technologies.
Skinning
This is the process of associating a character made with a skeleton. When you apply the skin modifier to a model it uses the bones you specify to determine how the model will deform when the skeleton is animated. Skinning work by linking each bone with vertices on the model if a vertex is affected by more than one bone. Then the bones influence on that vertex is determined by a weight value. A weight of 1.2 means the bone has complete influence over the vertex.
Footsteps extended
1. Select any part of the biped- on motion panel turn on footstep mode in biped rollout.
2. In footstep creation rollout choose a gait: run, walk, or jump.
3. Click create multiple footsteps- set number of footsteps you want and stride width.
4. Click create keys for inactive footsteps in the footstep operations rollout to create the keys, play it-if more frames are needed the length can be extended automatically.
5. You can move, and rotate the footsteps themselves and the bipeds feet will follow the footsteps automatically, you can also use bend and scale parameters in the footsteps operations rollout to change the selected footsteps.
6. To change feet timing- open track view.
|
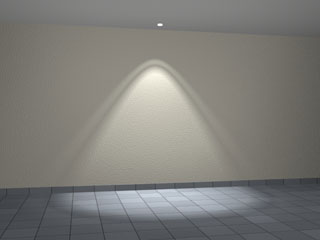
Lighting |
For General Lighting a 3 point or 4 point system with Standard lights provides general illumination without washing out your scene. MAX lights default to the Photo-metric type so you'll need to pick Standard from the dropdown menu before getting started. A light's intensity is set by it's Multiplier value in the Intensity/Color/Attenuation roll-out. Use Top view when you place lights in.
(Exterior Lighting)
Lighting for an outdoor scene requires a direct shadow-casting light to simulate the sun, a medium strength fill light to lighten the shadows and a dim underground light to simulate the sun, a medium strength fill light to lighten the shadows and a dim underground light to simulate bounced light. This setup works equally well with the default renderer and with mental ray.
